Sunday, August 26, 2012

Cashew Sauce


Cashew Pepper Gravy on brown and white rice

VEGAN. The word strikes fear into the heart of every host. Cooks break into a cold sweat asking themselves, "OMG, can I find anything to make without meat, dairy, eggs, honey...?" You know if you were on the vegan's side of the table, you would want more than just a side dish or two. And what about the non-vegans who accidentally get a helping of this stuff? Relax. Cashews to the rescue! Everyone is happy with this versatile, user-friendly base sauce. Here is the recipe, and alterations, for your eclectic table. (And kudos to you on the diversity of your guests!) 

Jan's Raw Cashew Sauce Base

About 3 C. raw cashews
5-6 C. water
salt to taste
A really good blender and spatula


Purchase raw cashews in the bulk area of a whole foods type market. Cashews will be fresher if there is a demand and decent turnover of product. When you get them to your kitchen, rinse cashews several times under the tap. Raw cashews can be a bit dirty. Add the clean nuts to your blender and pulse. Add water slowly, A LITTLE AT A TIME until the cashews are the consistency of creamy peanut butter. Scrape down the sides of your blender, making sure all wee chunks are pulverized. Add the rest of the water and blend; you now have cashew milk. So maybe you don't have a really good blender and you still have a substantially grainy texture, pour the milk through a fine mesh strainer into the saucepan before cooking and it'll work.

This cashew milk is the only thing you'll need for sauce--just add heat. In a large, deep sauce pan, cook over medium to medium high heat stirring constantly with a wire whisk. Soon the milk will start to thicken. Add salt and pepper to taste. You'll be surprised at the delicate, rich flavor. I'll go out on a limb here and assure you, you won't miss the dairy! Serve over potatoes, rice or pasta. OR...

Blend in a small jar of pimento peppers, garlic powder and lemon juice to make a sauce for mac'n'cheese

Add caramelized onions and vege-sausage

Saute mushrooms and onions in olive oil, add water and sauce base to make a cream of mushroom soup

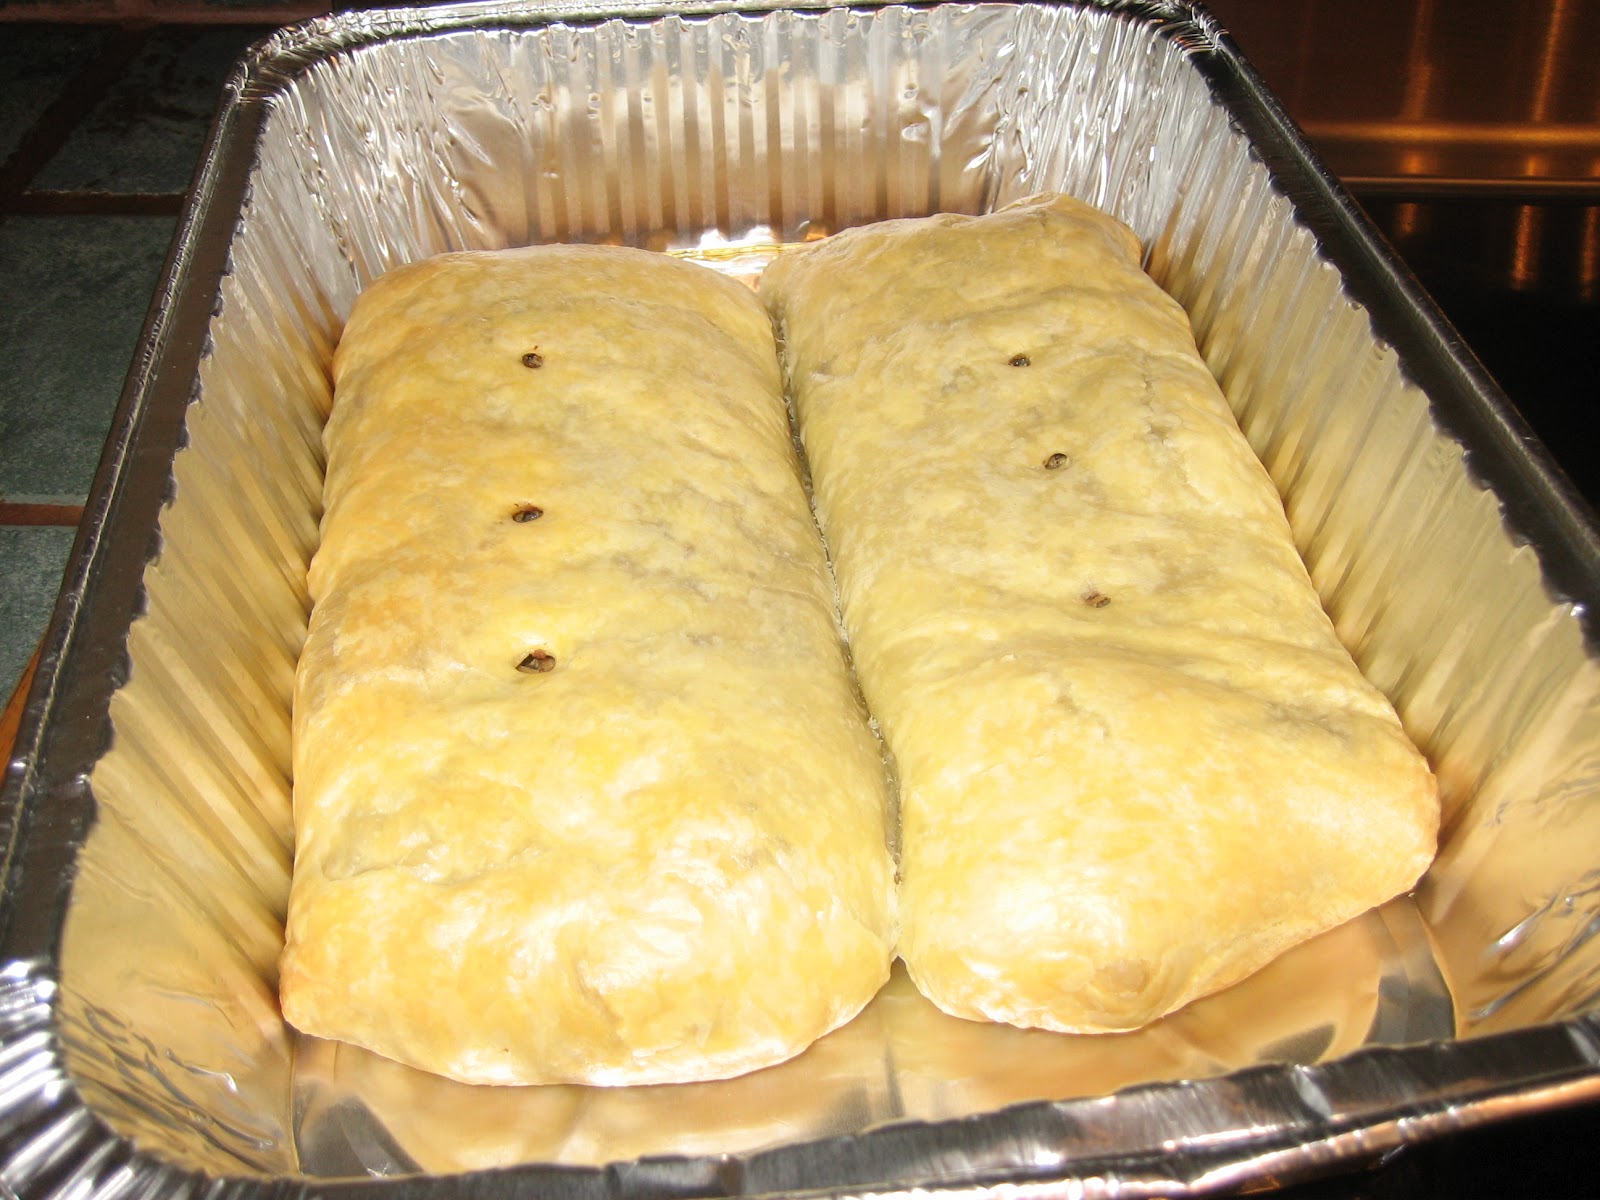
Ok, add some leftover chicken if you must! Throw in some English peas and carrots, top with pie crust and you've got a potpie ready to bake.

Get creative and use this as you would any white sauce...manga!        

(Thanks for the pics, Court!)


Friday, August 17, 2012

Muffy Muffins and The Muffin Formula

When it comes to baking from scratch, I think whenever you can do it--do it. But sometimes a shortcut or two to save time, money or energy, is practical and acceptable. The following recipe, which is really a formula of sorts, was a tried-and-true go-to for when I was a young mom. It's become a staple and for my now grown kids, a taste of home.

Jan's Muffy Muffins

1 C. Pioneer Baking Mix, no substitutes!
1 C. quick oats
1 C. milk

1/2 C. sugar, plus a bit more for sprinkling
1 egg
3 TBS veg oil

1 tsp vanilla extract

Preheat oven to 350 degrees. Pour milk into a mixing bowl, add oats and go fold some laundry for 15 minutes or so. Add sugar, egg, oil and vanilla. (To the bowl, not to the laundry!) Using a fork, beat mixture like a crazy person for about 30 seconds. Stir in Pioneer just until incorporated thoroughly. Pam spray a muffin pan for a dozen muffins. Get a big serving spoon or small ice cream scoop and evenly fill pan. Sprinkle muffin tops with sugar and bake for 20 minutes. Voila, muffins! Now for the best part, besides eating them of course, the formula...

Fill muffins with a two part pastry tip (available at crafts store) attached to a Ziploc bag with the corner snipped off. 

Jan's Muffin Formula

If you have 1 cup of Pioneer Baking Mix
1 cup of any other dry ingredient 
1 cup of wet (milk, buttermilk, mashed banana/sour cream, yogurt/almond milk, canned pumpkin/1/2&1/2...) and the rest of the above mentioned ingredients, you have muffins.

 Here are some suggestions for dry ingredients to accompany the Pioneer:  All Bran cereal or pretty much any cereal as long as it has been run through a blender to make a flour-like consistency, rye flour, rice flour, pecan meal, another cup of Pioneer, buckwheat four, coconut flour...you get where I'm going with this.

Your flavorings can change as well. Instead of vanilla, add almond extract. Throw in a pinch or two of nutmeg and a teaspoon of cinnamon. Add raisins or mini chocolate chips to the batter. Mix up a filling of softened cream cheese/powdered sugar and fill the muffins when they're done baking. Play with your food! You can make them as simple as Muffy Muffins or come up with your own crazy concoction. Have fun!

Court's pumpkin muffins (yummmmm)  for our most recent catering job

Thursday, August 16, 2012

Cast-Iron Skillet "Pie"

Most of my cooking experience comes from trial and error. Sometimes I learn a great new version of something. Sometimes I learn I should never do that again.

On one such trial-and-error instance, I was attempting to make cookies and left the leavening out. I had a bunch of plums sitting around, so I decided to use the batter in a cobbler-cake-pie application with the fruit.

It was a great new version of something. A Pie? No... a cake? Not really. Probably the closest to a cobbler... this recipe works with almost any juicy fruit, my favorite being stone fruits that are in season... and it's unbelievably easy. Today, I give you a cherry version. Enjoy.

Courtney's Cast-Iron Skillet "Pie"
Makes enough for about 8

~2 C chopped/pitted seasonal fruit
1/2 C toasted nuts (optional, I leave this step out most of the time
'cause the hubs doesn't like 'em... tragic)
1 + 1/2 C (scant) sugar, divided
2 eggs
3/4 C butter, melted
1 C whole wheat pastry flour (or unbleached all-purpose flour)
1 tsp almond extract
pinch of salt

Preheat oven and well-oiled cast-iron skillet (though a heavy-bottomed oven-safe pan would work fine, too, though you won't need to preheat that!) to 350 degrees.

While oven preheats, mix fruit, nuts (if using), and 1/2 C sugar and set aside.

Mix the remaining ingredients in a separate bowl until a thick batter is achieved.

When oven and skillet are preheated, take skillet out of oven and *carefully* pour in fruit/sugar mixture. Top with batter and spread as best you can without burning your fingers! Sprinkle with a little more sugar (important for forming an awesome crust on the finished product) and pop back into oven for around 45 mins.

Keep an eye on your "pie," with that much butter, it will burn pretty quickly. It's ready when it's golden brown all over, firm and bubbly in the middle, and smells like awesome.

Serve warm all by itself, or make it extra special with some fresh whipped cream or vanilla ice cream.

Enjoy!

Sunday, August 12, 2012

Kale Chips

August starts the second month of participation in a local co-op for my family. It's been a little bit of an adventure, really, in that we never know what we're going to get, and whatever it ends up being each week, we get a lot of it.

It is because of this little variable we most willingly subject ourselves to that I've been experimenting with some veggies and fruits that I would have otherwise never worked with on my own (outside of a one-time conventional try here and there).

In our very first co-op share, we received two very large bunches of kale. I had heard of them being turned into tasty, healthy, crispy chips, and decided that I would try my hand at a batch... winging it completely.

How hard could it be? Oil? Salt? Spices? Hmmmm.

So investing both bunches of kale, I gave it a good shot, and alas, though they did turn out crisp with good flavor, they were also way, way too salty (and coming from me, as family would tell you, that says a lot), and I didn't know how to store or reheat them, so they fell short, to say the least.

This week, we got another big bunch of deep green leafy kale. I decided it was time for redemption.

I think I got it right this time.

Courtney's Kale Chips
Makes enough for a few good snacks, but this is totally a 
'use what you have and eye it' kind of recipe

1 big bunch of fresh kale, either curly or Tuscan (aka dinosaur kale)
2 TBS olive oil
pinch of salt
1 tsp onion powder
1/2 tsp garlic powder
1/4 tsp smoked paprika
squeeze of lemon juice, or about 1/2 tsp vinegar 
pinch of sugar, if desired

Start with your kale, washed and shaken of any extra water
Fold leaves in half, so that the large rib of the stalk is exposed (keep your fingers out of the way!)

Trim stalks from leaves (save the stalks for the next time you make stock!)

Your leaves should look something like this... now cut leaves into chip-sized pieces

Mix oil, salt, spices, and lemon juice or vinegar. Toss
cut leaves to thoroughly coat

Place in one layer on parchment paper-covered cookie sheets, and bake at 300 degrees for about 20 minutes
(start checking them after about 15 minutes to make sure they don't overly-brown or burn)

Finished chips should be crisp all the way through,
with no soft or chewy spots.

These kale chips will be a surprising crowd pleaser, be it at a girls' night with wine and cheese, or next to a grilled PB&J for the kiddos. Enjoy!

Note: to re-crisp the next day, microwave in a single layer on a paper towel in 15-second increments until crispness comes back. Be careful, they can burn up if you don't pay attention!

Mushroom Strudel

My baby girl is 30 years old! Listen, when "old people" tell you that time flies--believe it! So we had a little family get-together over at casa de Kinney to celebrate the wonder that is Courtney. The menu was brunchy and casual with not too many leftovers leftover. Along with a big veggie tray and melon platter, I made Cinnamon Knots, Cheesey Potatoes, Maple Glazed Chicken, Mushroom Strudel, Lemonade Cake and Cream Filled Chocolate Cupcakes. Here is the recipe for Mushroom Strudel; but you can make a filling out of just about anything and pull this off.

Jan's Mushroom Strudel

1 lb. of your favorite sausage (vegetarian this time)
1 lb. raw mushrooms (I used good 'ole white button)
1/2 C. chopped celery
1 large onion, chopped
ghee or olive oil for sauteing
rubbed sage, salt and pepper to taste
1 pkg. frozen sheet puff pastry (2 sheets per pack)
Your favorite sauce/gravy (e.g. white sauce with Gruyere)

As soon as you get home from the store with puff pastry in hand, place the package in the refrigerator. Puff pastry must be thawed but cold when you put this together. I gave it two days in the frig. In the mean time for the filling, saute sausage until lightly browned. Set aside, drain off fat. Wash mushrooms and slice. Chop onions and celery. Use the same pan with either a little of the sausage fat, ghee (clarified butter) or olive oil and saute celery and onions with a pinch of salt. Throw them into a medium sized bowl. Saute mushrooms in the same manner, browning after natural liquid has evaporated and cooked down. You'll know they're at the browning stage when they start to squeak as they're moved around the pan. Add mushrooms and drained sausage to the bowl with the veggies. Season, stir thoroughly, cover and refrigerate filling until completely cooled.


Preheat oven to 400 degrees.To assemble, use the plastic wrap method* rolling puff pastry sheets to about half-again their original length/width. The dough will be very thin. Using the best kitchen tools you own (your hands), slightly compress and place half of the filling mixture in the center of that first pastry sheet, leaving enough of a border to wrap the filling burrito-style. Brush the bordering pastry lightly with water before overlapping/sealing edges. Place strudel in a Pammed baking dish, seam side down and repeat with second sheet. Poke a couple of holes in the top surface of each strudel for steam release. Since the filling is already precooked, you need only watch for the pastry to turn golden, about 30 minutes. If you want a super shiny strudel, brush with egg yolk/cream mixture. Personally, I don't want to waste a perfectly good egg! Serve sauce on the side or pour sauce at the ends and a bit down the middle right before serving. Carefully transfer to a nice platter (before sauce) or be lazy and use a fancy party dish like I did below!


* That's Just How I Roll any pastry, pie crusts included--between sheets of plastic wrap. You can move the plastic as you roll,  your rolling pin and counter stays clean, you're not adding too much flour and toughening the pastry, you can quickly chill thin pastry in the plastic wrap, and after you remove the top layer of plastic you can easily slip your hand in the center of the underside and flip your pie plate over pastry to center...so many reasons to use this method!


Wednesday, August 8, 2012

Falafel

Ever since hearing stories of the fresh, amazing food my sister-in-law experienced on her trip through the Middle East, I have been dying to try and make some falafel. Granted, I have no point of reference, but listening to her descriptions of the crispy, healthful, flavorful (and vegetarian!) "crunch patties" (Simpsons shout-out!) made me feel like I had a realistic expectation for what falafel should be.

I did a little research.

I did a little web surfing.

I consulted with my Mama.

We came up with this recipe... and I'd like to think we came pretty darn close to the real thing.

Falafel
Makes about 20 small, 1 1/4" thick patties

3/4 C dried chickpeas (aka garbanzo beans), soaked 10-12 hours and drained*
2 TBS fresh lemon juice
1/2 large onion, diced
2 large cloves garlic, diced (or 2 tsp minced garlic from a jar)
1 egg white
2 tsp ground coriander 
2 tsp ground cumin
1 tsp baking powder
1/4 C tightly packed chopped fresh parsley
salt and pepper
neutral-tasting oil for frying
pita bread, tomatoes, lettuce, cucumbers, avocado, and spreads for serving

Place drained chickpeas in a food processor and pulse until a coarse meal forms. Add lemon juice and blend until a finely-ground meal is achieved (stop before it becomes a paste!).

In the meantime, saute onion, garlic, coriander, and cumin in some olive oil with a pinch of salt until onions are tender.

In a large bowl (or pot, ahem), combine chickpeas with onion mixture, baking soda, chopped parsley, and a pinch or two of pepper (you could also add hot sauce here, if you'd like a little extra kick- we chose to leave it out).

Add egg white.

Form into small disc-like patties around 1" thick (or you could flatten
for an even thinner, crispier patty... more surface area = more
crispness, though the thinner you go, the more likely they are
to fall apart in the pan!)
*Note: the most authentic shape is actually a ball, however we
found that patties 'fit' the pita bread best, in our humble opinion

Carefully drop into hot oil (med-hi or around 350 degrees) and fry until golden brown. Patties should sizzle and brown quickly- if patties fall apart, the oil isn't hot enough... or they're too thin!

Remove from oil with slotted spoon or spider and place on a tray lined with paper towels. Serve hot with warm pita bread, chopped lettuce, sliced tomatoes, avocados, cucumbers, and sauces.

Mom's Favorite Falafel Sauce: 1/2 C sour cream, 1/4 tsp ground coriander, 1/4 tsp ground cumin, 1/4 tsp onion powder, 1/4 tsp chili powder, few squirts of red Tobasco, pinch or two of salt (to taste)

Dad's Favorite Falafel Sauce: 1/2 large cucumber, grated and squeezed of extra moisture, 1/4 C Greek yogurt, 1/2 tsp fresh lemon juice, 1/4 tsp chopped chives, 1 TBS finely chopped sweet onion, 
1/2 tsp dry dill weed, salt to taste

*If you don't have time to start with dried chickpeas and go through the soaking process, you can sub one can of garbanzo beans that you've drained and rinsed.

Sunday, August 5, 2012

Catpacks

I was a pretty fair cook when I married 30 years ago. But in all my (albeit limited) experience, I hadn't counted on marrying a vegetarian. You probably have veg friends so you know the 'ole "nothing with a face" style of cuisine. So you'll be seeing a few veg recipes from me, but not tonight! This catfish recipe allows me to make a single serving for myself and still have the time/energy to make the usual vegetarian fare for him. Bless his meatless heart, he doesn't know what he's missing!

Rinse fillets, run your fingers over flesh to check for bones

Jan's Catpacks
2 small fresh catfish fillets
1 medium onion, sliced
1/2 C bottled Italian salad dressing (not creamy)
2 TBS prepared yellow mustard
Dried oregano or Italian spice blend
Fresh garlic, chopped, to taste
Splash of your favorite vino (I prefer white for this)


Pull a generous sheet of foil and Pam the surface. Add a layer of sliced onion and then the fillets, centered on foil. Pour Italian dressing, splash of wine and mustard over the fillets. Sprinkle herbs and garlic over all.


 Seal up foil from front to back and side to side. Your catpack is now ready for the grill or a 350 degree oven for 45 minutes to an hour depending on size of fillets. Be sure to seal it well so you don't spring a leak; baking on a cookie sheet is highly recommended! Serve over rice, pasta (below) or all by itself in a bowl with crusty bread for dipping. This is a great recipe for serving more than one--everyone gets to season to taste. Catpacks easily create a soul-satisfying dish with sweet onions, savory sauce and tender pieces of meaty, yummy catfish! Enjoy!


Perfect Weekend Pancakes

There are two things my Mama taught me that have really served me well in the kitchen over the years: gather all your ingredients before you start cooking/baking, and clean as you go. By gathering all your ingredients before you begin a recipe, you can make sure you don't leave something important out (and by putting them all away after using them, you can insure you don't double anything), and by cleaning as you go, you get more time enjoying what you've made and less time cleaning up after yourself.

Brilliant.

I follow those rules every time I find myself in the kitchen, be it for an elaborate family meal, a simple summer afternoon lunch, or a Sunday morning, when no one wants to clean up, everyone's hungry, and the kiddos are crying for pancakes.

And cry for pancakes they do, especially these.

Note: don't be intimidated by the amount of ingredients in this recipe- together they make a moist, fluffy, wholesome pancake that any picky eater will enjoy, and they're easy to boot!


Courtney's Perfect Weekend Pancakes
Makes around 2 dozen pancakes, which freeze beautifully, by the way

1/2 C whole-wheat pastry flour (unbleached all-purpose flour works too)
1/2 C oat flour*
1/2 C rye flour*
1 1/2 tsp baking powder
1/2 tsp baking soda
1/2 tsp salt
1 C buttermilk
3/4 C nonfat milk
1 tsp vanilla extract
2 generous TBS honey (maple syrup works well too)
2 large eggs
2 TBS canola oil (or melted butter)
Any add-ins you might enjoy, like blueberries, walnuts, chocolate chips, etc.

Combine flours with baking powder, baking soda, and salt (aka the "dry" ingredients) in a large bowl. In a separate bowl, combine milks, eggs, vanilla, honey, and oil (aka the "wet" ingredients). Add wet ingredients to dry ingredients, and mix until just combined (don't over-mix, or pancakes will not be as fluffy!). Heat a pan or griddle to a medium-low heat, rub hot surface with a little butter, and cook pancakes (I use a 1/4-C ice cream scoop to measure the batter) until bubbles form and don't fill back in on the surface of each 'cake. Flip and cook ~1 min more (if using add-ins like blueberries, etc., sprinkle on the top of each pancake just after you pour the batter onto the pan/griddle,). 

Serve warm with butter and syrup, butter and powdered sugar, warm fruit compote, or my daughter's favorite- cinnamon applesauce.


Enjoy!

*You can substitute almost any type of flour in this recipe- you can leave out the rye and double up on all-purpose or whole-wheat pastry flour, you can do the entire recipe with all-purpose flour, or you can sub buckwheat for the oat flour... whatever you have on hand! 

It Was Inevitable

Welcome! You found us. Now what, exactly did you find? Good question.

As a first post, let us introduce- and explain- ourselves. It was inevitable, really, this little space we're starting. A blog created for recording and sharing the very lifeblood of our family: our recipes.

The two of us together will be creating and sharing in this space: Mother and Daughter, similar and yet so very different, and with the same sustaining common ground binding us together... our love of cooking. Our passion for creating. Our indulgences, short cuts, and mistakes learned from. All recorded in black and white, for us to reference, for you to share, for posterity.

With years of experience between us, and yet no formal training, we claim no greatness or professional authority... we welcome comments, constructive criticism, and suggestions, and will always be tweaking, tasting, and re-inventing as we go along. All the recipes that will be offered in this blog will be originals, unless otherwise noted.

We believe that, as with all things in life, good things are worth working for. However, we also live in the real world, where no one makes- from scratch- everything their families put into their mouths. We hope to offer recipes with variations that make it possible to create something grand from going the extra mile and whose results can be achieved with time-saving shortcuts.


With two busy lives, our posts may be sporadic, but they'll be worth waiting for, of that you may rest assured! Thanks for stopping by!

~Jan and Courtney