Showing posts with label Anytime. Show all posts

Saturday, January 19, 2013

Grilled Stuffed Peppers

Aaaah, if not for the 50- and 60-degree days in January, no on would live in Texas.

Feeling an urge to soak up some midwinter sun, yet still craving the comforts of an open fire? How about some tiny, sweet peppers in all the colors of sunshine, wrapped in bacon, and grilled to tasty perfection?

Sunshine? Check.

Fire? Check.

Tasty? Check, check, check!

Courtney's Grilled Stuffed Peppers
Assume 4-5 per person
This recipe stuffed about 30

1 cup fresh breadcrumbs (I used French bread)
1 cup shredded cheese (I used a colby/jack mix)
4 oz cream cheese, at room temp (1/2 package)
1 tsp garlic powder
1 tsp onion powder
2 large eggs

Dulcetta (small sweet) peppers, split from top to tail and any present seeds removed

Thick-cut bacon, one slice for every three peppers

Wash, split, and de-seed peppers (it is not necessary to remove the stem- in fact, leaving it on will enable
you to more completely close in the stuffing and prevent leaks while grilling).

In a medium-sized bowl, combine cream cheese, eggs, shredded cheese, garlic powder, and onion powder.

In a food processor, pulse 3-4 slices of fresh bread until a coarse
crumb is achieved (you are looking for about 1 cup crumbs). Add
crumbs to egg/cheese mixture.

Mixture should have a thick and relatively dry texture.

Carefully scoop filling into cleaned, split peppers, being careful not to break peppers apart.
My peppers held an average of 2 tsp of filling per pepper.

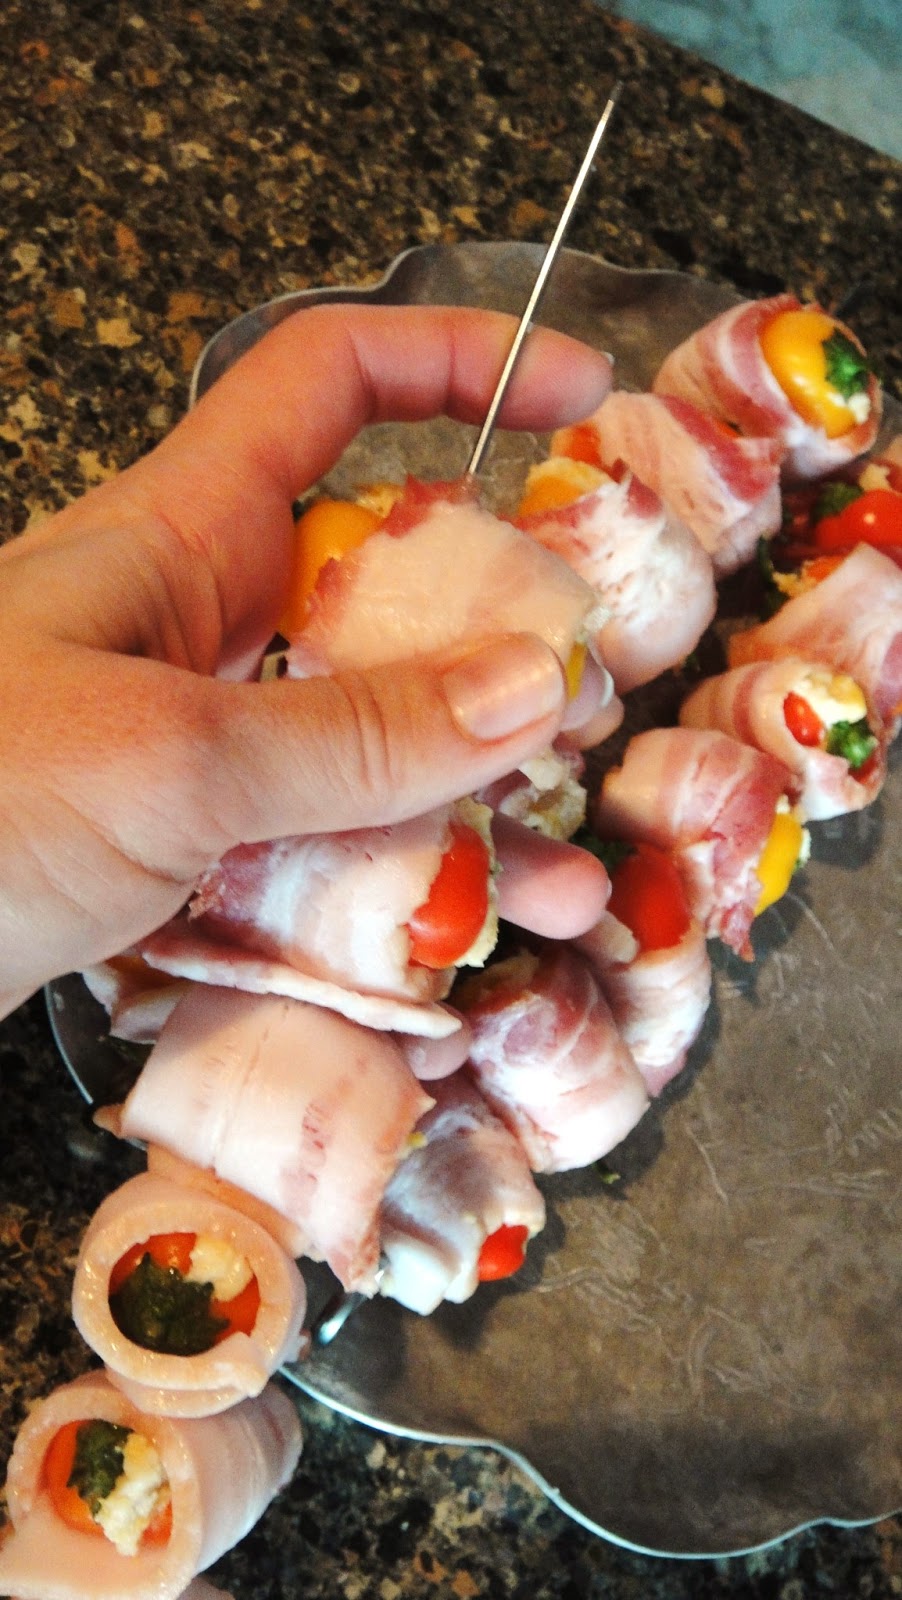
Once peppers are filled and squished closed, cut bacon
slices into thirds and wrap 1/3 piece of bacon around each pepper.
Slide on to skewer*, making sure skewer pierces overlapping
bacon ends to ensure a good wrap.

Place skewers of peppers over heated coals (avoiding open flames like in photo, unless super-charred is your style).
Peppers are ready when bacon is crisp, pepper skin is slightly charred, and filling is hot and gooey.
These peppers are a crowd pleaser, and a for-sure hit for any Super Bowl party that may be coming up, so put a pin in this and enjoy!

*If no grill there be, you can use toothpicks and your broiler!

Saturday, December 15, 2012

Ms. Kinney's White Trash

Before winter break, after my students have handed in their final projects and taken their final exams, I bestow upon them the ever coveted White Trash. In fact, this year I'm giving them the address of this blog so they can make it themselves.

It starts with your favorite cereals and salty snacks. My favs are Crispix, Rice Chex, Coco Roos, pretzel sticks, Cheezit crackers, Mini Ritz Bits sandwiches with peanut butter or honey roasted peanuts. One box/bag of each...mix 'em up and spread them out on a foil-covered surface.

Put a big heat-proof bowl over a pot of simmering water (called a double boiler)  But don't let the water boil! Now with a heavy knife, chop up a block of Almond Bark. Almond Bark is NOT white chocolate. You can buy it in the baking section of most grocery stores. It comes in a big segmented chunk that is too clunky to melt efficiently so you'll need those chopped, small pieces in the top of that double boiler if you value your time. Find a large ladle for stirring the melting bark--you'll also need it to do the dipping later.
I use a big stainless steel bowl over a deep pasta pot--notice the bark has plenty of room here. You want to keep it clear of any steam or drops of water! If water touches the bark at this stage, it will get all gummy and weird. That's called seizing up and if it happens you might as well just dump it and start over.
When the bark is smoooooth and ever so melty, ladle it over the cereal mix on the foil. Don't worry too much about big glops but you should try to spread it around evenly.

Use your hands to mix the melted bark and cereal stuff while the bark is still warm. It's very messy and stuff falls on the floor but totally worth the trouble.
Voila! White Trash! It doesn't take long to firm up and "dry." Break it up and place in plastic bags or air-tight containers. It freezes well and, even when left out for snacking, stays fresh tasting for a long time.
Merry Christmas and Happy First Semester's End to my fabulous Art students! Love you guys!  --Ms. K


Sunday, December 9, 2012

Toffee

Homemade Toffee!

Nothing says Christmas like the smell of candy making in the kitchen! This toffee recipe is a bit time consuming but soooooo worth it! Over the years, I've given pounds and pounds away to family, neighbors and friends with glowing reviews. Here's the recipe:

 Jan's Toffee
1 C. butter
1 1/4 C. packed, light brown sugar
3 TBS water
1 TBS corn syrup
pinch of salt


1 C. toasted, chopped pecans and 1 C. chocolate chips (optional)
 
You'll need a large, heavy sauce pan--cast iron is great. In these pics, I had to use my Dutch oven as it was a holiday batch and the recipe was quadrupled. 
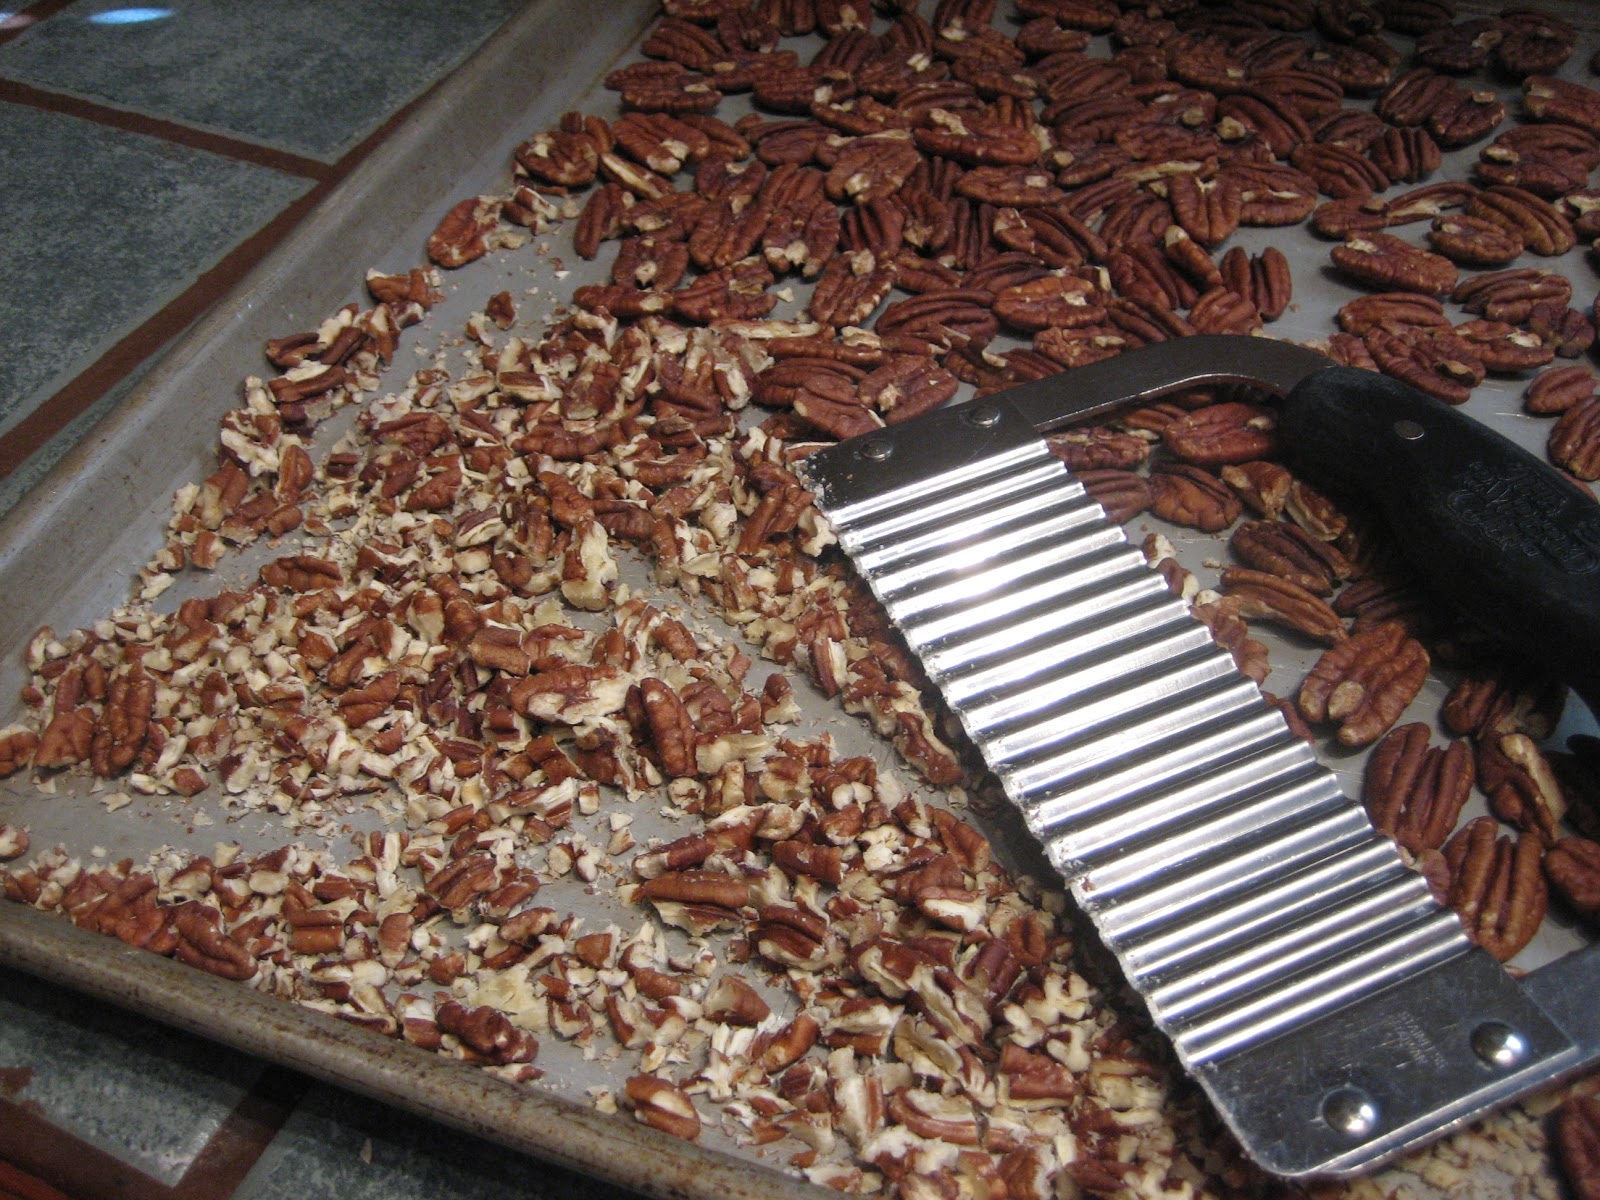
If you do the nutty variety, toast your pecans in a 300 degree oven for about 8 minutes. Watch them closely so they don't burn! Chop them up and spread them on a heat-resistant surface covered in  Pammed foil. 


Melt the butter over medium-high heat and add the rest of the ingredients minus nuts and chocolate chips.

Get about 5 teaspoons from your silverware drawer and a heat proof, 2 cup container of cold water and set it beside your stove top. You'll need these later...
Stir like a crazy person (not too fast, just very committed) constantly making sure to scrape the bottom as you go. A wooden spoon works well here. At first it will look like the butter will never homogenize with the sugar, but be patient. In about 30-40 minutes it will look like the pic below.
This is where it gets a bit dangerous and tricky. Dangerous because the toffee is like lava--avoid getting it on your skin! Tricky because it's time to start testing the "done-ness" for the soft crack stage. Now for the teaspoons and water...
This is the old fashioned method of candy making--when the candy lava is dipped out of the pot and drizzled into cold water, it stiffens. At first, it may just be a blob in the bottom. Keep cooking and stirring. Test again. This time, it's like soft caramel. Yummy, but still not done. Change out the water but don't take too long because you need to keep stirring! Finally, you'll test it and the sugary squiggles will break with a soft crack--hence the name. You're ready to pour onto your Pammed foil.


Take the toffee off of the heat.I use a large ladle and carefully dip and pour over the pecans. 

This batch was half with nuts/chocolate and half without. The chocolate chips are sprinkled over the hot toffee immediately after pouring it onto the foil. The heat of the mixture is plenty hot enough to melt the chocolate. Just take a spatula and spread it evenly over the candy's surface.


When cool, break into pieces and store in plastic bags or air tight containers. It freezes well but your chocolate will "bloom," that is, it will appear a bit chalky on the surface. This condition does not effect the taste at all, and I've never had any complaints!

Have a happy holiday season and watch out! This toffee is totally addictive!


Sunday, August 26, 2012

Cashew Sauce


Cashew Pepper Gravy on brown and white rice

VEGAN. The word strikes fear into the heart of every host. Cooks break into a cold sweat asking themselves, "OMG, can I find anything to make without meat, dairy, eggs, honey...?" You know if you were on the vegan's side of the table, you would want more than just a side dish or two. And what about the non-vegans who accidentally get a helping of this stuff? Relax. Cashews to the rescue! Everyone is happy with this versatile, user-friendly base sauce. Here is the recipe, and alterations, for your eclectic table. (And kudos to you on the diversity of your guests!) 

Jan's Raw Cashew Sauce Base

About 3 C. raw cashews
5-6 C. water
salt to taste
A really good blender and spatula


Purchase raw cashews in the bulk area of a whole foods type market. Cashews will be fresher if there is a demand and decent turnover of product. When you get them to your kitchen, rinse cashews several times under the tap. Raw cashews can be a bit dirty. Add the clean nuts to your blender and pulse. Add water slowly, A LITTLE AT A TIME until the cashews are the consistency of creamy peanut butter. Scrape down the sides of your blender, making sure all wee chunks are pulverized. Add the rest of the water and blend; you now have cashew milk. So maybe you don't have a really good blender and you still have a substantially grainy texture, pour the milk through a fine mesh strainer into the saucepan before cooking and it'll work.

This cashew milk is the only thing you'll need for sauce--just add heat. In a large, deep sauce pan, cook over medium to medium high heat stirring constantly with a wire whisk. Soon the milk will start to thicken. Add salt and pepper to taste. You'll be surprised at the delicate, rich flavor. I'll go out on a limb here and assure you, you won't miss the dairy! Serve over potatoes, rice or pasta. OR...

Blend in a small jar of pimento peppers, garlic powder and lemon juice to make a sauce for mac'n'cheese

Add caramelized onions and vege-sausage

Saute mushrooms and onions in olive oil, add water and sauce base to make a cream of mushroom soup

Ok, add some leftover chicken if you must! Throw in some English peas and carrots, top with pie crust and you've got a potpie ready to bake.

Get creative and use this as you would any white sauce...manga!        

(Thanks for the pics, Court!)


Friday, August 17, 2012

Muffy Muffins and The Muffin Formula

When it comes to baking from scratch, I think whenever you can do it--do it. But sometimes a shortcut or two to save time, money or energy, is practical and acceptable. The following recipe, which is really a formula of sorts, was a tried-and-true go-to for when I was a young mom. It's become a staple and for my now grown kids, a taste of home.

Jan's Muffy Muffins

1 C. Pioneer Baking Mix, no substitutes!
1 C. quick oats
1 C. milk

1/2 C. sugar, plus a bit more for sprinkling
1 egg
3 TBS veg oil

1 tsp vanilla extract

Preheat oven to 350 degrees. Pour milk into a mixing bowl, add oats and go fold some laundry for 15 minutes or so. Add sugar, egg, oil and vanilla. (To the bowl, not to the laundry!) Using a fork, beat mixture like a crazy person for about 30 seconds. Stir in Pioneer just until incorporated thoroughly. Pam spray a muffin pan for a dozen muffins. Get a big serving spoon or small ice cream scoop and evenly fill pan. Sprinkle muffin tops with sugar and bake for 20 minutes. Voila, muffins! Now for the best part, besides eating them of course, the formula...

Fill muffins with a two part pastry tip (available at crafts store) attached to a Ziploc bag with the corner snipped off. 

Jan's Muffin Formula

If you have 1 cup of Pioneer Baking Mix
1 cup of any other dry ingredient 
1 cup of wet (milk, buttermilk, mashed banana/sour cream, yogurt/almond milk, canned pumpkin/1/2&1/2...) and the rest of the above mentioned ingredients, you have muffins.

 Here are some suggestions for dry ingredients to accompany the Pioneer:  All Bran cereal or pretty much any cereal as long as it has been run through a blender to make a flour-like consistency, rye flour, rice flour, pecan meal, another cup of Pioneer, buckwheat four, coconut flour...you get where I'm going with this.

Your flavorings can change as well. Instead of vanilla, add almond extract. Throw in a pinch or two of nutmeg and a teaspoon of cinnamon. Add raisins or mini chocolate chips to the batter. Mix up a filling of softened cream cheese/powdered sugar and fill the muffins when they're done baking. Play with your food! You can make them as simple as Muffy Muffins or come up with your own crazy concoction. Have fun!

Court's pumpkin muffins (yummmmm)  for our most recent catering job

Sunday, August 12, 2012

Kale Chips

August starts the second month of participation in a local co-op for my family. It's been a little bit of an adventure, really, in that we never know what we're going to get, and whatever it ends up being each week, we get a lot of it.

It is because of this little variable we most willingly subject ourselves to that I've been experimenting with some veggies and fruits that I would have otherwise never worked with on my own (outside of a one-time conventional try here and there).

In our very first co-op share, we received two very large bunches of kale. I had heard of them being turned into tasty, healthy, crispy chips, and decided that I would try my hand at a batch... winging it completely.

How hard could it be? Oil? Salt? Spices? Hmmmm.

So investing both bunches of kale, I gave it a good shot, and alas, though they did turn out crisp with good flavor, they were also way, way too salty (and coming from me, as family would tell you, that says a lot), and I didn't know how to store or reheat them, so they fell short, to say the least.

This week, we got another big bunch of deep green leafy kale. I decided it was time for redemption.

I think I got it right this time.

Courtney's Kale Chips
Makes enough for a few good snacks, but this is totally a 
'use what you have and eye it' kind of recipe

1 big bunch of fresh kale, either curly or Tuscan (aka dinosaur kale)
2 TBS olive oil
pinch of salt
1 tsp onion powder
1/2 tsp garlic powder
1/4 tsp smoked paprika
squeeze of lemon juice, or about 1/2 tsp vinegar 
pinch of sugar, if desired

Start with your kale, washed and shaken of any extra water
Fold leaves in half, so that the large rib of the stalk is exposed (keep your fingers out of the way!)

Trim stalks from leaves (save the stalks for the next time you make stock!)

Your leaves should look something like this... now cut leaves into chip-sized pieces

Mix oil, salt, spices, and lemon juice or vinegar. Toss
cut leaves to thoroughly coat

Place in one layer on parchment paper-covered cookie sheets, and bake at 300 degrees for about 20 minutes
(start checking them after about 15 minutes to make sure they don't overly-brown or burn)

Finished chips should be crisp all the way through,
with no soft or chewy spots.

These kale chips will be a surprising crowd pleaser, be it at a girls' night with wine and cheese, or next to a grilled PB&J for the kiddos. Enjoy!

Note: to re-crisp the next day, microwave in a single layer on a paper towel in 15-second increments until crispness comes back. Be careful, they can burn up if you don't pay attention!